You are currently viewing How To Create A Windows 10 USB Recovery Drive

How To Create A Windows 10 USB Recovery Drive

*Disclosure: We only recommend products we would use ourselves and all opinions expressed here are ours. This post may contain affiliate links that at no additional cost to you. As an Amazon Associate, We may earn a small commission.

Stop and think, are you prepared for any eventuality with your pc?
Do you know, your windows 10 pc can stop working at any time?
Create a Windows 10 USB Recovery Drive now to be prepare.
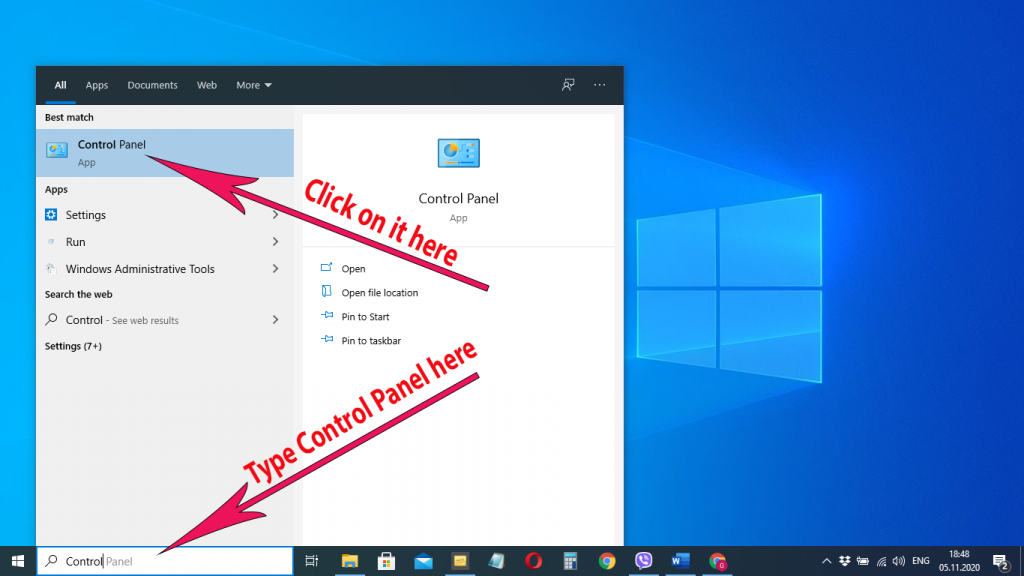
Keep reading, in this post we are going to learn how to create a Windows 10 USB recovery drive.

Many factors can make your windows 10 to stop working, hardware failure, the system crashed, Corrupted system files, some windows updates, etc.

That is why it’s very important to create a Windows 10 USB recovery drive so that when any of the above mentioned happened, we can use it to recover our windows, or even reinstalling Windows 10. That is why it is called a recovery drive. Wikipedia describes it as the focus of recovery or rescue is to not lose the data files on the hard drive.

If you bought a computer a few years ago with Windows XP, Vista, or Windows 7, it may probably come with a recovery CD, that will let you fix any problems that may occur with your pc. But these days, it’s rare to find a Windows 10 computer that even has a CD tray, and manufacturers don’t include any recovery tools other than what you get with Windows.

That’s why it’s really important to make a recovery drive like what we are about to do just now, just in case anything goes wrong with your computer.

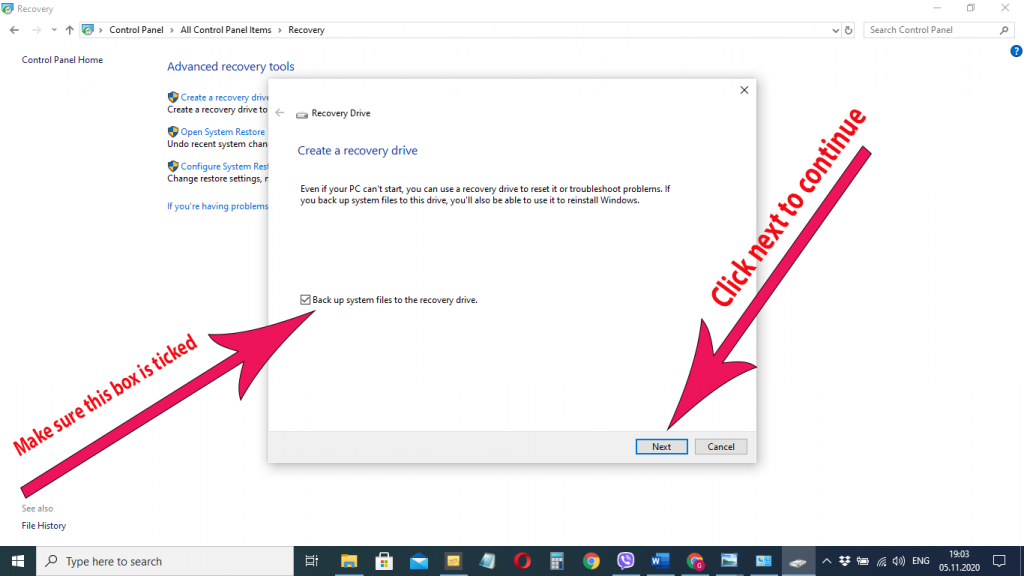
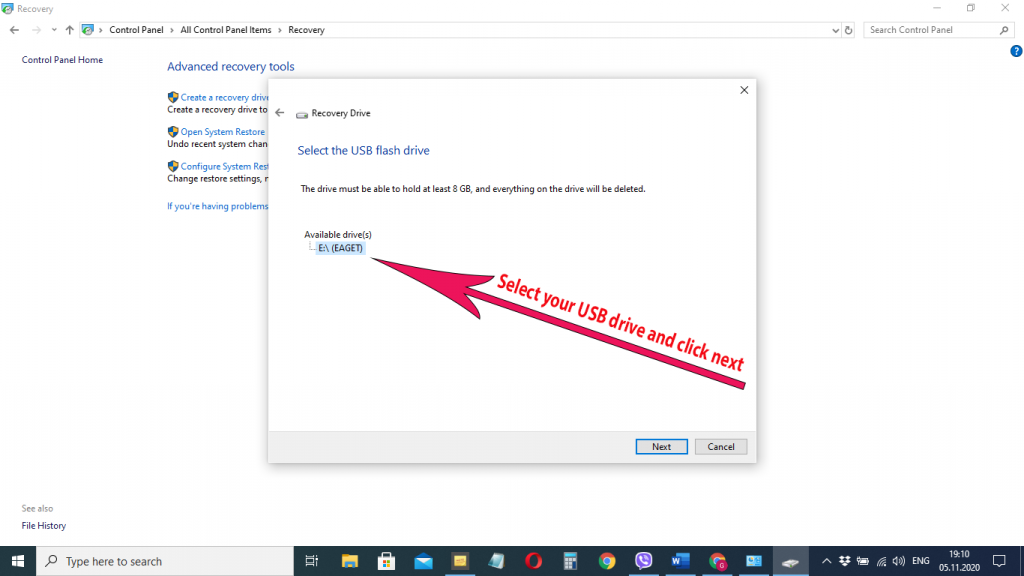
In this post, I’m going to show you how easy it is to make a recovery drive. I’ll show you what kind of memory stick you need to buy.

Automatic Repair

Moreover, Windows 10 computer, has a built-in set of tools that you can use to repair it. These tools can be useful, at times when a computer will try to install a big Windows 10 update. And if for some reason the windows update failed partway through, you can be left with a computer that will not start up windows.

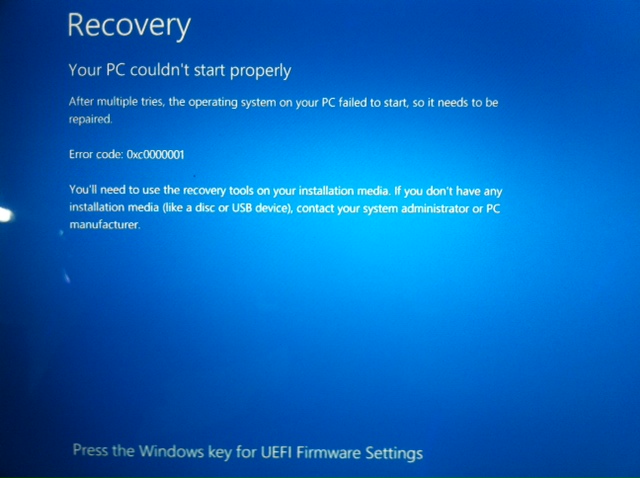
Windows also has an Automatic Repair tool that in some cases if you are lucky it can repair itself and start-up windows again correctly, but if the automatic repair failed, you will get a message like automatic repair couldn’t repair your pc. See the image below.

automatic repair couldn't repair your pc

This is when a Windows 10 USB recovery drive comes in, that is if you had created one earlier. A recovery drive is just a normal USB memory stick containing all the tools you need to fix Windows when it won’t start. And ideally, it contains a copy of Windows 10, so you can reinstall the operating system if all else fails.

Now for us to be prepared for any eventuality, we are going to go through the steps in creating a Windows 10 USB recovery drive together. First, you will need a memory stick ( USB DRIVE)  that’s got enough capacity for everything that’s needed to repair your computer. According to Microsoft Support, You’ll need a USB drive that’s at least 16 gigabytes.

I will also recommend that you buy a decent brand like SanDisk, Integral, or Kingston. Because your memory stick could be sitting around for a long time before it’s ever used, but when the time comes for a recovery drive you’ll need to rely on it, so I’d recommend buying a decent brand.

These USB drives are usually not that expensive you can get some decent brands from Amazon and Aliexpress at affordable prices.

MAKING THE RECOVERY DRIVE

Once you’ve got the memory stick, your Windows 10 computer has everything built in that you’ll need to make the recovery drive. Plugin the memory stick, and if anything appears on the screen, you can ignore it. We need to open the Control Panel, so click on the Start Menu. Then type in Control, and click on the Control Panel. See the image below.

open the Control Panel

When the Control Panel opens, the ‘View By’ option might be on Category, We want it to say Large icons, so change it to Large icons if it isn’t already. See the image below.

Then click on Recovery. See the image below.

Windows 10 USB recovery drive

Then click Create a Recovery Drive. See the image below.

Create a Recovery Drive

On the next page, you’ll see a check box to Back up system files to the recovery drive. Make sure this is ticked then click Next. See the image below.

Back up system files to the recovery drive

After a short wait, you’ll be asked to select your memory stick. Make sure you choose the correct drive then click Next. See the image below.

creating Windows 10 USB recovery drive

The next page will be a warning page, read it carefully because if there’s anything on your memory stick at the moment, it will be deleted. If you’re ready, click Create. See the image below.

warning page

At this point, you have to wait for a long time. This part can take an hour and a half or so. Once the recovery drive has been made, you can click Safely Remove, and Eject the memory stick. Make sure you label the memory stick as the Recovery Drive for this computer and keep it somewhere safe.

If you have any comments or doubt somewhere, please contact us or drop a comment in the comments section below. We will be glad to help.


This Post Has 4 Comments

  1. Your style is really unique compared to other people I have read stuff
    from. Thank you for posting when you have the opportunity, Guess I will just book mark this site.

  2. site

    It’s a pity you don’t have a donate button! I’d certainly
    donate to this brilliant blog!
    I guess for now I’ll settle for bookmarking and adding
    your RSS feed to my Google account.
    I look forward to brand new updates and will talk about this site with
    my Facebook group. Chat soon!

    1. gadgetsskyway

      It is our pleasure, to help our readers and friends like you

Leave a Reply